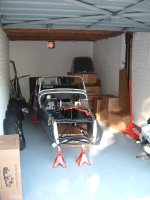
Wednesday, July 20, 2011

A little late posting

In the end Caterham completed my car. The parts came in too late for me to finish it - hence the blog just stopped. I was very dissapointed that I could not complete the build myself. Others that year had similar experiences due to the switch from the imperial chassie to the metric.
Anyway I had great academy year coming 3rd overall with best finish of 2nd place at Cadwell and Brands.
I then converted the car to RSB spec had a very dissapointing opening round with a DNF and a 20th. I wasn't to be written off though and followed up with a 2nd and 6th at Castle combe and than a maiden Pole and win and 2nd at Cadwell park. Unfortuately then I had to hang my helmet for being skint.
I Sadly sold my Caterham to a young chap who has since sold it onto someone else who has been in touch as he is racing my old car on and off.
I loved owning my Caterham though. The high lights where winning my first race, an epic trip driving it to the Ring completing 14 laps and on to Spa for a open pitlane trackday on the way back. Doing over 20 track/test days, 11 races, learning how to drive, falling in love with Cadwell park - it's rare a week passes without thinking about it - yes the Goose neck is just a lift then flat in fourth you just need the right line....brake earlier for hall bend than carry the speed through...the thought go on and on

Fo 2010 I bought a Formula Vee (a single seater based around beetle suspension and engine - a little faster than RSA on a lap)

I realised Caterhams really do offer gentle intro to motorsport. The learning curve is steep the competition is tighter and money really does help. Best results where a 4th at Brands a Pole in the wet at Oulton. I also qualied 3rd at Cadwell but with mechancal issues in race 1 and a spin in race two I failed to capitilise on being the 2nd fastest car out there in my Leastone - I guess also at Cadwell the driving can really make up time where as at Silverston I was 4 seconds off the fastest due to the long power sapping straights.
My car is now up for sale a year 2000 Leastone with Brian James Minno £4000 Send me an email if you are interested.

Tuesday, November 14, 2006

Engine install ! !

Day 6 - 11/11/2006

Over the weekend I installed the heart of my Caterham - 1.6ltr K-series - 112bhp allowing 0-60 in 6.7sec and top speed 112mph (not a massively quick or powerful car but I'm sure it's quick enough for me!)

I thought the diff was a challenge, this is another level.

Picked up the engine crane on Friday night from 'Crescent Hire'* took it home and put it the garage ready for Saturday morning.

Woke up for an early start (9am is early on a Saturday) and went down to the garage with my mate Jethro - extra hands and support for the day!
TOP TIP - Check you have all the parts before hiring the crane!! Rooting round in the garage for a full hour before actually starting anything gathering all the bits needed for linking the gearbox/bellhousing/engine together. I was missing: 4 spilt washers and the Gearbox/bellhousing gasket. Off to the local Motor factors. I bought a sheet of gasket material(£1.45) and some instant gasket - no splitwashers of that size.

Once back in the garage I made my own gasket and started the install. Pretty straight forward this bit just bolt the GB and BH together where it lines up then put on all your bits (I forgot the Clutch release bearing - noticed before I got too far on luckily). I then put the engine on a piece of 4x2 with the crane to make it easier to offer the GB up. It slid on easily and all the bolts went on fine (which are all Allen key type 8 and 10mm). Next the starter motor - things didn't quite make sense here - it is quite apparent though the starter you have is not the one mentioned in the manual and does not require any of the spacers or bolts or anything to do with solenoid TOP TIP - if you have an academy car do not put on the short red lead to connect the starter motor to the battery - instead leave the top bolt nearest to you loose (will make sense later).
Making progress now. Moving on to installing some of the cooling pipes - the large and small J pipes - the thermostat is on the lower right of the engine not the Black pipe on the top left - as when reading the manual this could easily mistaken for what it's talking about (thought it was a new fangled type until I saw the other bit).

Lifting the engine and GB into the air for the first time is quite a sight. Keeping a good grip on both the crane and engine Jethro and I maneuvered it round over the engine bay. Pushing down on the GB to get the best angle of attack and edging the crane forward seemed the best way to go, stopping every so often to lower the crane (It is easier if you take the Alternator off in hindsight as it is rather tight) Plenty of jiggling, pushing, twisting and groaning got the engine and GB in - the hardest part is aligning the prop and the back end of the GB - also keep looking underneath as it's easy for the GB mount to catch and hinder progress. TOP TIP- At this point the manual says put on the Manifold - Don't! It just gets in the way and damages the side of the car. Putting on the engine brackets with this on is pretty hard to - can be done though. TOP TIP - at this point put in the speedo drive - the access hole does not line up with it and once the gearbox is bolted you can't get the drive in - so do it now while you can move it about to get clearance. Bolting it all up was simple and just involves pushing the engine here and there to get the bolts to catch. After that a few electrical things to plug in.

I was going to attach the Clutch but the clevis pin only arrived in the post today. Also I was going to put on the exhaust but I had imperial bolts instead of Metric ones -
Advice - if a bolt is not going in do not force it, it will probably be the wrong one - ring James at Caterham and get him to send the right ones - it's a real headache if cross thread the chassie mounts!! I haven't fortunately.

Good news on the parts front - Lower Wish Bones are in, the roll cages any time now and it's only the De Dion bars they have no idea. Hope it's soon - so I guess the front end will be complete soon!!

Thursday, November 09, 2006

Diff is for difficult.....

Day 5 - 09/11/2006

Today had a late start, again. I was planning on putting in the engine but lack of communication between me and pal meant I hadn't actually said to him if it was on or not. So a pair of hands down I couldn't really start the engine.

Sliding under the car I reacquainted myself with

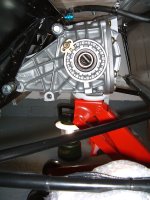
how much progress I had made with the diff - none. It was sitting on the jack waiting for the lower bolts to be put in. These lined up and went in a dream. Now for those pesky spacer washers - very awkward, they are just so tiny and keep falling all over the place - TOP TIP - put grease on each face of the washers so they stick

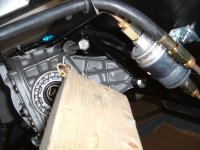
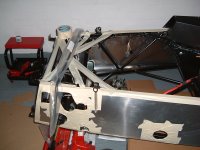
together (even when dropped) push into place and dab a large blob of grease under them - hey presto the washers stay in place even as you belt the top bolt to get it in! With the lower mounts and spacers in I tried to thread the top bolt through - not a chance (see pics) looks 4-5mm out. I rang the factory:

1. Check the bolt is straight 2. Whack it harder 3. Run a 1/2in drill bit through the diff holes 4. Try from the other side 5. Put a chamfer on the end of the bolt.
Results:
1. My bolt is bent - on the head are some markings so I worked out which way they faced when the bolt had least resistance 2. I might have been a little soft 3. I just took off the casting lines inside for a slightly looser fit 4. Didn't want to as very near the fuel pump and you might whack it - I used a large piece of wood so I was no danger of doing so 5. No need already had it in!!

No sooner than it was in I realised my fatal error - No end washer!! All that for nothing, but it was easier the second time and the grease trick held the washers in place and I didn't even have to touch them!

With a smile of achievement on my face I looked to the propshaft as the next task - but almost simultaneously both of my rechargable light sources dimmed and went out- typical. In the remaining natural light I found the prop bolts (which are not blue as manual states) and removed the masking tape from the front - TOP TIP - don't leave masking tape on for longer than 2 days unless you enjoy spending hours cleaning off residue and tiny bits of tape - it's less time consuming to remove it now then re-apply it.

Early start tomorrow!

Tuesday, November 07, 2006

Postman brings gifts....

Day 4 - 07/11/2006

Took the cat to vet to have his life changed (not happy) so, had a late start on the car. It was ok as I needed to wait for the postie anyway. As he was delivering the cheese wedge and two correct size bolts for the lower diff mounts. They arrived at 11.30 (not bad these days..).

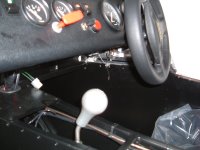
I started with the cheese wedge - A minor thing but the top rivet hole is exactly in line with clutch return spring - the bottom two had plenty of clearance. I decided before fixing it down I would thread the assembly through it and get all together to ensure I drilled and fixed it in the right place. All went fine - I may have to adjust the position of the wheel by rotating it in the splines as it's hard to tell where dead ahead is with out the wheels or disks on- we'll see. I then sealed the cheese wedge in - it doesn't look that pretty but it's not so bad without the flash on it - it's not silicone either it's a proper rubber stuff about 25 times stronger and should last 30 years instead of 7-8.

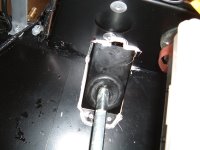
I then sat in the car for ten minutes twiddling the wheel...brmm brmm. After that I double checked my fitment of the rack and everything else I had done and found the lower grommet wasn't exactly sealing against the lower shaft - does yours look like this (see pic) or do I have the wrong grommet - please let me know! (will edit once I know the truth).

Moved on to the Diff , got the top mount in no probs - used the jack - the lower mounts no such luck, even though they thread into the diff fine and fit the bushes they just don't line up once in place. After a call to James the workshop confirmed (contrary to the manual) get the bottom ones in and spaced then knock in the top bolt with a soft hammer. Had another quick go on my own, but decided to wait for some help.

End of day.

Monday, November 06, 2006

The bits are out there...somewhere...

Day 3 - 05/11/2006

Got home from work early, about 2.30 ish - It was time to find out where and when my missing parts were. Well where they are no one knows, when they'll be here the same. No answers. Is this a good enough service after shelling out 18k+, I'm not sure. Well anyway James[the chap at Caterham] was polite and seemed genuinely concerned and promised me I was in the top 10 to first receive my missing parts. I was/am very disappointed - I've taken most of this week off work to get the bulk of building done - this, now, will just not happen.

After much questioning I fathomed James was telling the truth and I then tried to get him to advise me on what I can get up to in my free time. It turns out I can fit the engine and gearbox and ancillaries - that should keep me busy for a bit. Still annoyed though....

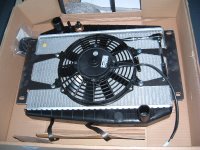
It was getting late in the day now at about 4pm to start any thing major like the engine and g/box. I had a look in the boxes and found the radiator and took to putting the fan on and loosely mounting it on the car. Not sure about the nyloc's supplied for fixing the fan on as the captive bolts don't quite pass through them. Also I found in a bag some aluminum washers x8 - no mention of them in the Manuel but I assume they go either side of the Rad mounts (see pic). After that i made another not so good discovery - the bolt that holds on the water tank is the wrong thread and and won't go in but a few turns - Another call will be made tomorrow.

After that I wanted to feel I had got nearer to driving the car some how and put the steering wheel loosely on the quick release boss - after pretending I was Jensen Button pre GP I locked up garage and headed in for tea.

The Joy of back order......


04/11/2006 - Day 2

After discovering a raft of parts missing yesterday today I decided to start on some things that are not mentioned on the shortages list.

The steering rack. Off to flying start - rack in - bolts and brackets on - tie rod ends on 11 turns each locking nut engaged - SVA covers slid over. Next locate cheese shaped wedge thing to go behind pedal box. After a thorough search it was declared missing. B**##***s!! So that was out the window.

Next the diff - Climbing under the car with necessary bolts and washers I tested the long top mount - perfect. So balancing the diff on my new jack a raised it into position and threaded through the top bolt (this seemed all to easy as in other diaries this could be deemed almost impossible). With that done all I had to do was locate and space out the lower mounts- well guess what? No missing parts the parts supplies are just wrong and don't fit - a mix up apparently with old and new.

With my spirit dampened I locked up the garage until Monday to get some answers.

Saturday, November 04, 2006

My car is here - Hurrah!!


03/11/2006 - Day 1

Today at approximately 1.30pm my life changed forever.

A new era of scuffed knuckles, cursing missing bits and smiling had begun.
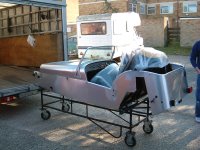
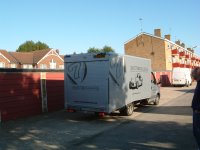
Sighting the truck pulling up outside my flat lead to whoops of joy as I and my mate Jethro ran down the stairs to greet the bringer of my new found joy. Opening up the back of his delivery truck revealed what I had been waiting for since parting with vast sums of money almost 6 months ago. My car!

In various boxes and little plastic bags were all the bits - or so I hoped - waiting to be assembled. I couldn't wait. After thanking the delivery driver and seeing him off I entered my new home for the next few weeks - the garage full to bursting with Caterham stuff!

Where should I begin - well I opened every box and looked through to familiarize myself with every thing. Then I decided we should attempt the front suspension. A quick recci for bits soon revealed a lacking in the lower wish bone R/h and L/h - I then decided it would be a good idea to check the missing components list - this revealed some disappointing facts. It was obvious the roll cage was missing but, so also was the de dion bar and rear radius arm. I could not start on any part of the suspension. Gutted. So to get things going I put masking tape on all the vunerable parts and went to the local autofactors for some basic supplies - copper slip, grease, loctite etc.etc. and called it a day.